Beginner’s Guide to Canva: Creating Content Easily
You’ve seen the commercials and heard about Canva, but what is it? Here is a beginner’s guide to Canva to help you get started and convince you why you should be using it.
Let me start off by disclosing: I am not getting paid by Canva to talk about their website. I simply think it is an incredible tool for marketers (without Graphic Design experience) to take their content to the next level. If your business requires a need of a graphic designer then hire a graphic designer. This should not take place over hiring a professional who is qualified and trained. Now, moving on.
A Beginner’s Guide to Canva: Getting Started
Setting Up Your Account
Before you get started, decide whether you would like to use a work or personal email for the account. If you are planning to use this for work purposes only and would like to be reimbursed for the cost (don’t worry, this is for premium), consider signing up with your work email.
*Note: You can sign in using social media, but I would advise against doing this. Instead, use an email. This avoids you needing a code generator or a second step to keep you from accessing the site.
Now that your account is set up, let’s really get started!
Setting Up Files
I get it. You’re finally signed in and ready to start customizing and playing with the exciting tools of Canva. Before you get started, I urge to you create folders first. This will get you in the habit of organizing your content instead of having it all thrown onto your main screen. Click “Home” and find the “All Your Folders” section. Click on this and start creating folders based on what content you’ll be creating.

I have my files set up based on businesses. This means I have folders labeled for businesses I freelance with to keep all that info together and have separate folders for Moody Blue Media and my passion project Moody Blue Elvis.
Now that you have your folders set up, or at least at a starting point, you can get started on creating content!
Creating Content
Canva makes it easy to create almost any content you may need. Presentations for work, developing a new logo, even Instagram Stories – the possibilities are endless. We will go through a lot of those in the future. For now, let’s create content for this blog post together!
Since I have a premium account, I was able to set up a brand kit. We will go through a brand kit and premium accounts in a later post. For now, see if Canva is a smart tool for you and your business before investing. A lot can be accomplished with the free account.
Create A Design
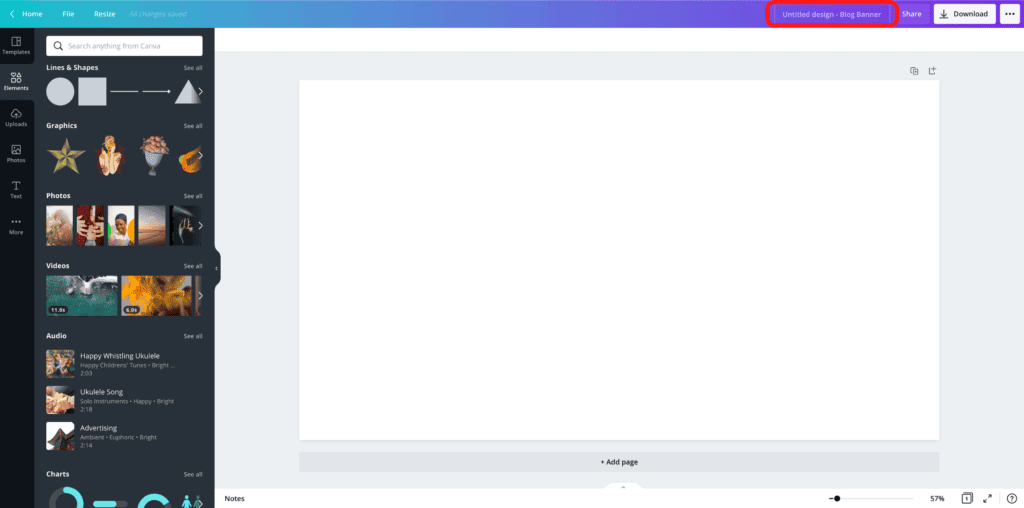
At the top of the page, click “Create a design.” A lot of options will appear. In the search bar, type in “blog banner” and select that option.

A new window will appear with a blank canvas in the appropriate size. Before we get started, make sure to title your new document. This will make it easier to organize your files later. To rename your document, click on the area at the type right of the screen where you see the words, “Untitled design – Blog Banner.” This will remove that title and allow you to type in something new.
Now is when we can get started.
As you can see, our blog has a specific style we like to keep. All of these designs came straight from Canva, but I lay them out how I want. If you are not quite there yet, you will see a section on the left side of your screen labeled “templates.” This will help you with the layout. All you’ll have to do is edit the colors, text, and imagery to match your brand.
Make A Design
I like to keep the colors rotating depending on when the blog post will go live, making the background of this featured image white. For teaching purposes, I’ll show you how to change the background color. Click on the blank canvas. It should highlight teal around it. Just above the left portion of the canvas is a square filled with colors. Click on the square, and here you can select the color of the background.
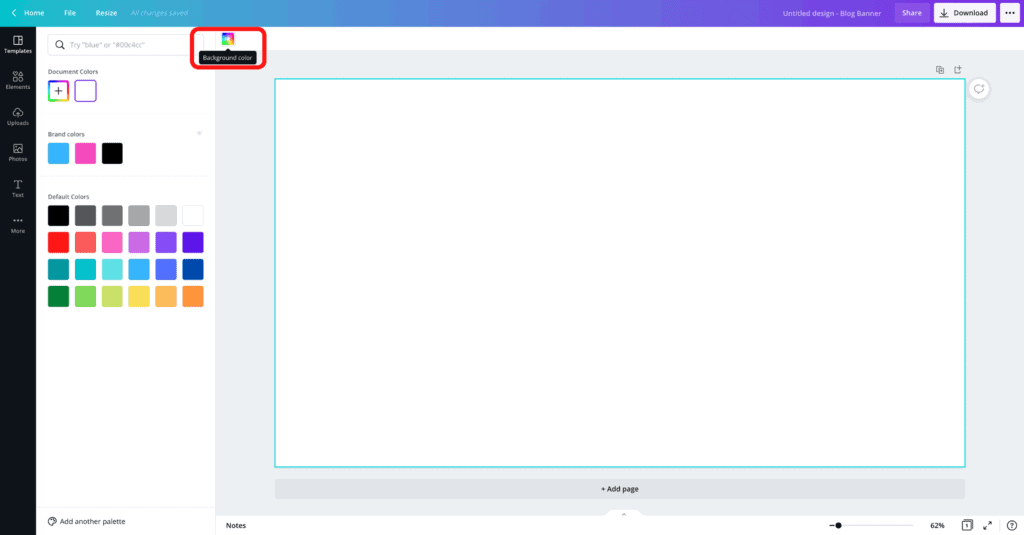
Now that the background color has been selected, we can begin adding text.
On the lefthand side of your screen, you will see an option labeled “Text.” When you click on this, several options will appear. Click on “Add a heading” and watch as it appears on the blank canvas. Using the toolbar above the canvas, you can adjust the size, color, and font to your liking.
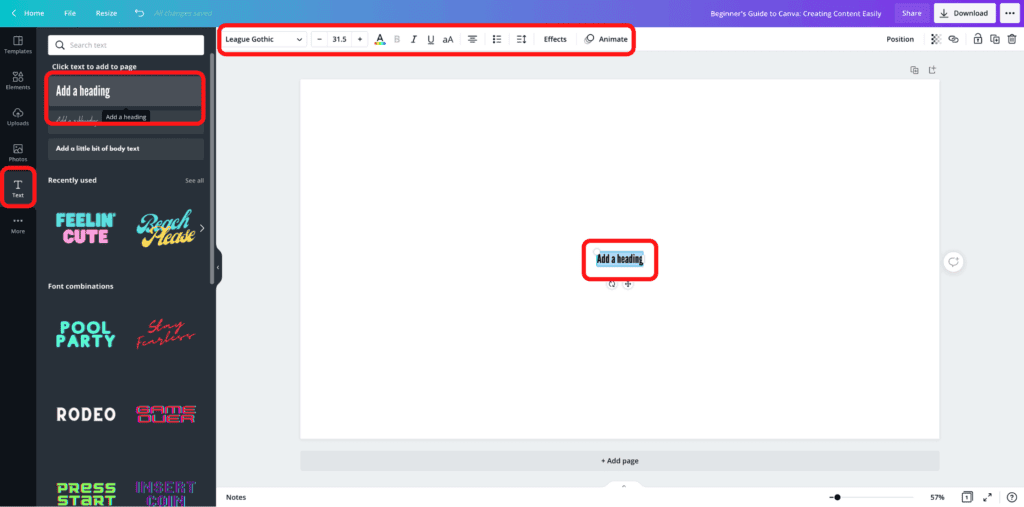
Using the title of this blog post, I will create the text I like, adjust the sizing, and change the colors to match our brand style.
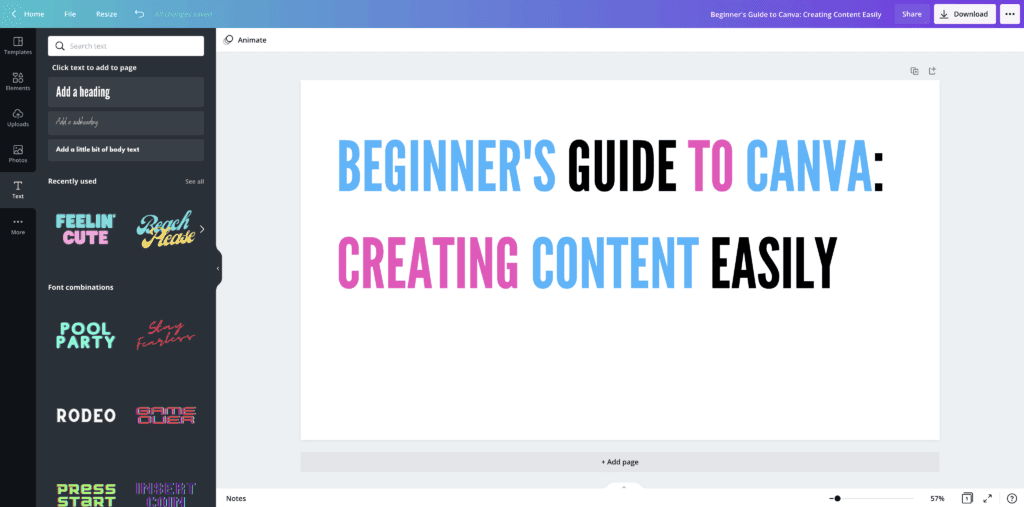
Adding Flair!
Now, we can dive into the elements Canva has to offer. This is where we can add flair to just about anything! Click on “Elements” on the lefthand side of the screen and type in the search bar “Canva.”
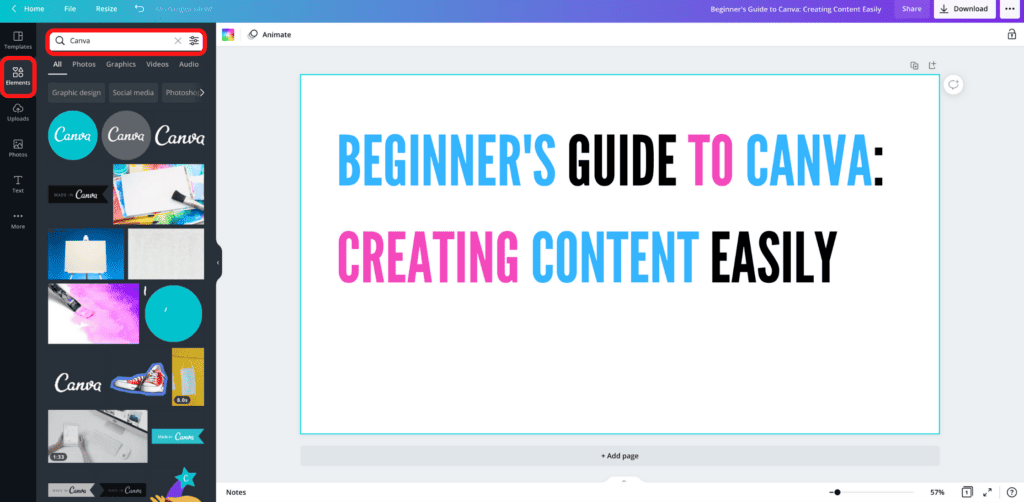
Take your time to experiment. Move things around, change font sizes or styles. You never know what you may create until you take some chances!
Here is my final product:
Have questions or concerns about Canva? Reach out! We are more than happy to assist you getting setup and started using Canva. Remember, this is just the beginner’s guide to Canva so there is a lot more to come.
Until next time,
TCB,


